Step 0: Preparing the Image
 I found the scan of Hakkenden from AnimePaper and decided to use it for my wallpaper. However, to make a wallpaper I had to extend the image horizontally to fit the widescreen format. This was achieved in Illustrator, using fairly simple paths to define the shape of the trees, and then applying several effects of roughen and twist at low levels to create the jaggy edges that defined the leaves. The image was then exported to Photoshop at 200% size where some texture was added.
Step 1: Base Layer
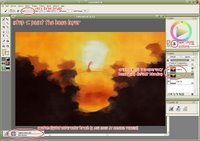 I created a new blank canvas in Painter, and then opened my prepped image, setting this as the clone source. With a very large watercolor brush I basically filled the canvas with color. At this stage it wasn't very important to get all the details right - just make sure the canvas is covered. This fills the large areas (like the orange sky and the darkest layer of trees) quickly and easily.
It's useful to have a copy of the original as the top layer in your file, set at a low transparency. Although you can use 'tracing paper' to see a semi-transparent version of your clone file, you don't have any control over it. Having it as a layer means you can show or hide at will, change the transparency levels, etc, so it's easy to see what you're cloning from.
Step 2: Start adding details
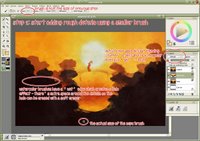 Using a smaller brush (half the size of the first brush) I began to more closely define the edges. I don't repaint the entire image, just the edges. Note that in using the watercolor option in Painter you get white halos around the brush. Be sure to have plenty of extra space at your edges, so you can easily remove them with a soft eraser when you are finished.
Step 3: Second verse, same as the first
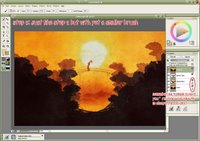 Continue as before using yet a smaller brush. Also, be sure to lock your previous layers, as it will prevent you from painting over a finished layer.
Step 4: Small enough for details?
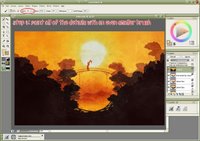 When you get down to 8px you can actually define all the details at the edges. In this step I used not only 8px brushes but also 4px and 2px for especially detailed areas (the area around the geisha, and the bridge, for the most part.)
Step 5: Blend it all together
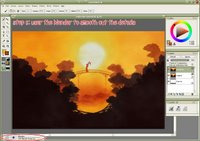 After the watercolor portion is done, you'll want to erase those halos I mentioned earlier. I did that in Photoshop (because I could select the layer's transparency and use a feathered mask on the layer.) Afterwards all of the layers were merged. The canvas was also extended ~50px in all directions and the color cloned at the top. This is because when you use the blender tools in Painter, it pulls an average color of what is beneath your brush - and at the edges of the canvas, it pulls in white, giving you a bad frame effect.
Like before, use a large blender for expediency, and smaller blenders when you're painting around the edges. Below is a typical workflow:
Step 5a: (the before shot)
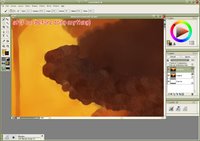 Here is the edge of a tree, before anything is done.
Step 5b: Blending the edges
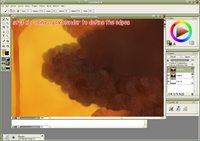 First, using a small (6px) blender, define the edges of the tree. Since all the trees have scalloped edges, make sure your brush stroke is in the same type of semi-circle. Also, by going slightly beyond the edge of the tree, you'll pull in the lighter color behind it. This gives the edges a bit of glow and adds depth.
Step 5c: Filling the interior
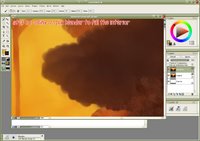 Using a larger (12px) blender, fill in the rest of the tree. This technique could also be useful in painting clouds, as they have the same scallop edges and lighting emphasis.
After the blending step, there were some final post-production steps in Photoshop - cropping the extra pixels out from step 5, adding a hint of texture to emphasize the painting style, text (a haiku from Issa), and final colors and levels adjustment. Finally, add your signature and post it on your website!
1 comment:
Nice tutorial. Too bad me and Painter just don't like each other, hehe. But I guess one can sort of replicate a similar process in Photoshop as well, one just needs to learn how to use a normal round brush and color picking while trying to blend colors together (or simply using the cheap healing tool trick, though the result ain't that great as blending with brushes, in my opinion).
Post a Comment